Wednesday, January 29, 2020

Dairy-free Macaroons

Dairy-Free Coconut Macaroon Cookies

Dairy-free coconut macaroons


The Spruce / Claire Cohen
  • Total: 20 mins
  • Prep: 5 mins
  • Cook: 15 mins
  • Yield: 3 dozen cookies (serves 18)
Nutritional Guidelines (per serving)
151 Calories
7g Fat
20g Carbs
2g Protein
(Nutrition information is calculated using an ingredient database and should be considered an estimate.)
Macaroons originated in Italy between the 1500s and 1700s. They have become popular around the world as cultures have adapted the original recipe. This dairy-free recipe is closer to the traditional coconut macaroons and may be new to many bakers' dessert repertoire. This simple recipe for dairy-free macaroons are coconut-based, although some macaroons use ground almonds instead. They are elegant and fun treats for cocktail hour or as a post-dinner sweet. They take less than 20 minutes to prepare and bake, from start to finish. Feel free to substitute the vanilla or almond extract with other flavorings of your choice; orange and lemon extracts yield good results, and during the holidays, peppermint macaroons are a festive idea for any family or company celebration.

Storing Macaroons

Dairy-free coconut macaroons will keep at room temperature in an airtight container for up to three days. But refrigerating them after they have been properly cooked for up to 24 hours will help the flavors meld and make them more firm for ease of serving. Be sure to let the macaroons cool before storing them. Metal containers will keep these macaroons crisper than plastic containers. If storing a large batch, layer macaroons between parchment paper.

Freezing and Refrigerating Macaroons

Pack the coconut macaroon dough very tightly to ensure a more tender cookie. The dough can be refrigerated for up to a week and frozen for up to six weeks in an air-tight plastic container or freezer bag. Thaw in the container for 15 minutes at room temperature. Pack dough in containers, or shape slice-and-bake dough into logs and wrap. To thaw, place in the refrigerator overnight before reheating.

Ingredients

  • 5 cups coconut (finely-shredded, unsweetened)
  • 1 1/2 cup sugar (granulated)
  • Pinch of salt
  • 4 large egg whites (lightly beaten)
  • 1 teaspoon pure vanilla extract (or almond extract)

Steps to Make It

  1. Preheat the oven to 350 F. Line 2 large baking sheets with parchment paper.
  2. In a large mixing bowl, mix together the coconut, sugar and salt. Add the egg whites and vanilla extract, mixing until well combined.
  3. Using your hands, form the mixture into small 1 1/2 to 2 tablespoon mounds, transferring each to the prepared baking sheets as you work.
  4. Bake until just the peaks of the cookies are light golden brown, about 12 to 15 minutes, turning the pan halfway through to ensure even baking. Allow the cookies to cool completely on a wire cooling rack. Serve at room temperature.
Wednesday, January 22, 2020

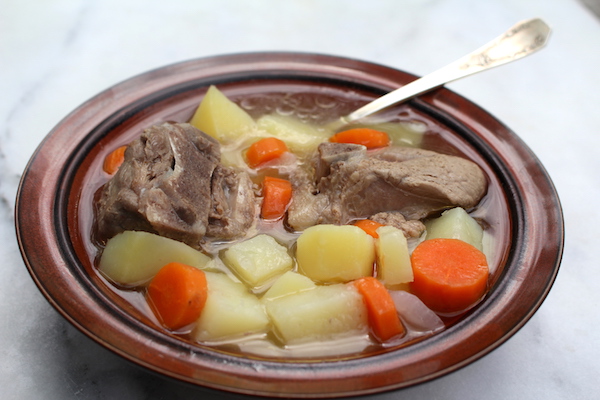
Kjötsúpa (Traditional Icelandic Lamb Soup)

Credit for this recipe goes to adamantkitchen.com
 
I fell in love with this soup during a trip to Iceland celebrating my father's 80th birthday. It was served everywhere - in Reykjavik, in convenience stores, and most memorably, at the waiting hut for a tour to go into a dormant volcano!

It's easy to make, though I find browning the meat is essential.  And it's incredibly tasty, especially with fresh bread!
 
 
Yield: 4-6 Servings

Kjötsúpa (Traditional Icelandic Lamb Soup)

Kjötsúpa (Traditional Icelandic Lamb Soup)
4.7 Stars (3 Reviews)
Icelandic lamb soup is simple fare, and the perfect comfort food for a cold night.

Ingredients

  • 2 to 2 1/2 lbs (1 kg) Mutton or Lamb (Shoulder or Neck), bone-in, cut into rough pieces
  • 1 large rutabaga (Swede), chopped
  • 4 large carrots, chopped
  • 6 waxy potatoes, chopped1 onion, chopped
  • Salt and Pepper to Taste

Instructions

  1. Place meat in a large soup pot, such as a 6-quart dutch oven, and cover with cool water. 
  2. Slowly bring the meat and water to a boil and then reduce the heat to very low.
  3. Simmer the meat for about an hour, until it’s very tender.  Skim away any surface scum (if necessary).
  4. Add the chopped vegetables and simmer until they’re tender, about 20 more minutes.
  5. Serve Kjötsúpa hot.

Saturday, June 8, 2019

Homemade Pizza

I stole the pizza recipe from Chabad.  The pizza sauce recipe came from allrecipes.com.  It was easier to do than I thought, and surprisingly delicious!

Dough Ingredients:

  • 1 1/2 cups warm water
  • 1 tsp. dry yeast
  • 3 1/2 - 4 cups flour
  • 1 tsp. kosher salt
  • 1 tbsp. olive oil

Toppings:

  • 1 cup tomato sauce (1/4-1/2 cup per pizza. See recipe below.)
  • 4 cups shredded cheese (1-2 cups per pizza)
  • Mushrooms, sliced
  • Peppers, thinly sliced
  • Purple onion, thinly sliced
  • Olives, sliced
  • Pineapple, in chunks

Directions:

  1. 1. Preheat your oven to 500F.
  2. 2. Put the water and yeast in a small bowl. (Mixture does not need to bubble.)
  3. 3. Mix all ingredients until combined. Knead for 3-4 minutes. If dough feels sticky, flour your hands to make it easier to knead.
  4. 4. Divide dough into 4 balls, cover with a damp cloth and set it aside to rest for about 10 minutes.
  5. 5. Roll out the first ball into a 12-inch circle. Or roll it out to a 10-inch circle and then toss it! That's much more fun!  Here's a video on how!  Carefully transfer dough to a pizza pan. (If you don't have a pizza pan, you can use a regular baking sheet.)
  6. 6. Spread 1/4 cup (or more, if you prefer) of sauce over the dough, and put the pizza in the oven for 3-4 minutes.
  7. 7. Take the pizza out, cover with 1-2 cups shredded cheese and the toppings of your choice.
  8. 8. Return pizza to the oven for another 8-10minutes (until cheese is bubbling).
  9. 9. Remove, let cool 5 minutes, cut into slices and serve immediately.
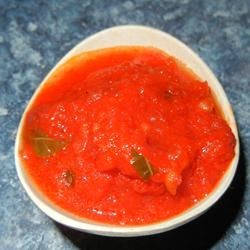
  10. Delicious Pizza Sauce Recipe 

    Delicious Pizza Sauce Recipe

    Rated as 4.72 out of 5 Stars
    Recipe By:rabit100
    "My child could make this! It's that easy!"

    Ingredients

    • 2 tablespoons olive oil
    • 1 (28 ounce) can crushed tomatoes
    • 2 leaves basil, chopped
     
    • 3 cloves garlic, chopped
    • 1 pinch salt and ground black pepper to taste
    • 1 pinch grated Parmesan cheese

    Directions

    1. Heat olive oil in a saucepan. Pour crushed tomatoes into the saucepan and place over low heat. Stir basil, garlic, salt, and black pepper into the tomatoes; bring to a simmer. Add Parmesan cheese to sauce to serve.

Saturday, February 9, 2019

Jewish Apple Cake


This recipe comes from "The Jewish Holiday Cookbook" by Joan Nathan.

As with many other recipes, this isn't particularly Jewish, except that it doesn't use any dairy, which makes it a nice dessert for a dessert when your meal includes meat.  Kosher rules, you may not know, forbid mixing meat and dairy.  Somewhere in the Torah, it says we're not to boil a kid in its mother's milk, and we've expanded that to say no meat with any dairy at all, just to be on the safe side.

Unless the meat is fish, in which case it doesn't count as meat.  Keeper kosher can be very complicated!

Another note on this recipe - yes, you really don't peel the apples.  I know, I was suspicious, too. But I made a test cake with same apple layers peeled and some unpeeled, and people liked the version with the peels better.  The peels got nice and tender in the baking, and, when I used red Macintosh apples, made for some pretty color in the finished cake, too.

I did find a key point was to use a non-stick bundt pan, greased with Pam with flour in it.  After years of unsuccessful bundt cake attempts, Annette from Shaffer's Cake and Candy Supplies in Berwick told me about this trick, and it worked like a charm - the cake slid right out of the pan!

Also, this recipe makes a LOT of batter. My first effort rose over the pan and spilled through the hole in the middle, where it built into a small tower.  So make sure you put your bundt pan on a cookie sheet your first time.

Ingredients:

5 large apples
2 tsp cinnamon
2 Cups sugar
4 eggs
1 Cup vegetable oil
1/2 Cup orange juice
1 tsp vanilla
3 Cups unsifted flour
3 tsp baking powder
1/2 tsp salt

1. Preheat oven to 350 degrees. Core and slice apples into eights. Place in a large bowl and sprinkle with the cinnamon and 5 tablespoons of the sugar.

2. Beat the eggs and gradually add the remaining sugar, oil, orange juice and vanilla.

3. Sift together flour, baking powder and salt. Combine with egg mixture. (Confession: I never sift them together. I add the baking powder and salt to the liquid and stir them in so they're well incorporated. Then I add the flour gradually. It seems to work fine.)

4. Grease a tube pan and dust with flour.  Better yet, spray with Pam Baking Spray with Flour.

5. Pour 1/3 of the batter into the pan. Layer with 1/3 of the apples. Repeat for two more layers, ending with the apples on top. Bake 1 1/2 hours until golden on top. Let sit a few minutes and then unmold.


Ingredients:

Red and Green Summer Salad - served for our Challah Day in 2019

This recipe comes from "The Gourmet Jewish Cookbook" by Denise Phillips.

Truth to tell, this is not a particularly Jewish recipe - except it doesn't involve any dairy, which is great, because it means you can serve it with meat when you're keeping kosher.  That's rarer than you think - a surprising number of my salad recipes include cheese of one kind or another.

It serves 6, and claims to take only 15 minutes to prepare, but I found chopping took longer.

Ingredients:

For the dressing:

1/4 Cup olive oil
1 TB wholegrain mustard. (I used Nathan's Spicy.)
Zest and juice of one lemon
1 TB clear honey
salt and pepper to taste

For the salad:
1 bulb of fennel, trimmed, core removed, and roughly chopped
2 avocados, peeled, stoned and cut in strips
8 oz baby spinach
11 oz strawberries, trimmed and cut in half or smaller
2  red peppers, deseeded and roughly chopped

1. Whisk the dressing ingredients together and adjust according to taste.
2. Combine everything else, and pour the dressing over the salad just before serving.

Sunday, December 30, 2018

Fancy charoses


Personally, I like my mom’s basic, tried and true charoses – apples, walnuts, sugar, cinnamon and sweet red kosher for Passover wine, mixed to taste.  But if you’re feeling you need a little more zip to your seder table, Joan Nathan is always a good bet! Thanks to the New York Times for publishing this!

Provençal Haroseth for Passover

  • YIELDAbout 5 cups
  • TIME15 minutes
Provençal Haroseth for Passover
Melina Hammer for The New York Times

INGREDIENTS

  • 1 cup blanched or roasted unsalted almonds
  • 1 cup raisins
  • 1 cup dried apricots
  • 1 cup dried figs
  • ½ cup walnut halves
  • 1 tart apple, peeled, cored and chopped into 1-inch pieces
  • 1 cup peeled roasted chestnuts(available vacuum-packed or canned)
  • ½ cup pine nuts, toasted if desired
  • 1 teaspoon ground cinnamon
  • 1 teaspoon ground ginger
  • 3 tablespoons red wine vinegar
  • 4 to 6 tablespoons sweet wine, kosher for Passover

PREPARATION

  1. Place the almonds, raisins, apricots, figs, walnuts, apple, and chestnuts in the bowl of a food processor and pulse until you reach the consistency of your choice.
  2. Add the pine nuts and stir in the cinnamon, ginger and wine vinegar. Pulse once more, adding enough sweet wine to bind the ingredients.
  3. Store, covered, in the refrigerator for up to 2 weeks.

Creme Brulee


My good friends Chris Lent and Amanda Birk joined me in making this treat, from The Food Network, for our Night of Fire, when every dish we make is flambéed or otherwise involves an open flame. (Except that time we included gefilte fish. But that’s another story.)
This was easier to make than I feared, though I did have to prepare by making my own vanilla sugar, which isn’t sold around here.
Here’s how you do that:
1.      Remove the seeds from a vanilla bean with a sharp knife.
2.      Place them in a food processor, along with a few cups of granulated sugar
3.      Turn on the food processor.
4.      Put it into jars.


Creme Brulee

  • Level: Intermediate
  • Total: 3 hr 30 min
  • Prep: 15 min
  • Inactive: 2 hr 15 min
  • Cook: 1 hr
  • Yield: 6 servings

Ingredients

1 quart heavy cream
1 vanilla bean, split and scraped
1 cup vanilla sugar, divided
6 large egg yolks
2 quarts hot water


Directions


  1. Preheat the oven to 325 degrees F. 
  2. Place the cream, vanilla bean and its pulp into a medium saucepan set over medium-high heat and bring to a boil. Remove from the heat, cover and allow to sit for 15 minutes. Remove the vanilla bean and reserve for another use. 
  3. In a medium bowl, whisk together 1/2 cup sugar and the egg yolks until well blended and it just starts to lighten in color. Add the cream a little at a time, stirring continually. Pour the liquid into 6 (7 to 8-ounce) ramekins. Place the ramekins into a large cake pan or roasting pan. Pour enough hot water into the pan to come halfway up the sides of the ramekins. Bake just until the creme brulee is set, but still trembling in the center, approximately 40 to 45 minutes. 
  4. Remove the ramekins from the roasting pan and refrigerate for at least 2 hours and up to 3 days. Remove the creme brulee from the refrigerator for at least 30 minutes prior to browning the sugar on top. Divide the remaining 1/2 cup vanilla sugar equally among the 6 dishes and spread evenly on top. Using a torch, melt the sugar and form a crispy top. Allow the creme brulee to sit for at least 5 minutes before serving.